Welcome to the NuWave Oven Instructions Manual! This guide provides comprehensive directions for safe and effective use of your NuWave Oven. Discover key features‚ safety tips‚ and expert techniques to enhance your cooking experience. Explore step-by-step instructions‚ troubleshooting solutions‚ and model-specific guidance to maximize your appliance’s performance. This manual is designed to help you get the most out of your NuWave Oven‚ ensuring delicious‚ healthy meals with ease.
Overview of the NuWave Oven
The NuWave Oven is a versatile‚ advanced kitchen appliance designed for efficient and healthy cooking. It uses infrared‚ convection‚ and precision heat to cook meals evenly and quickly. With models like the Pro Smart Oven and Bravo XL‚ it offers multi-level cooking options using the extender ring. Ideal for baking‚ grilling‚ air frying‚ and dehydrating‚ the NuWave Oven promotes oil-free cooking. Its user-friendly design and customizable settings make it perfect for home chefs seeking convenience and versatility in preparing a wide range of dishes.
Importance of Reading the Manual
Reading the NuWave Oven manual is crucial for safe and effective operation. It provides essential safety precautions‚ detailed instructions‚ and troubleshooting tips. Understanding the appliance’s features‚ such as multi-level cooking and precise temperature control‚ ensures optimal performance. The manual also covers warranty information and maintenance tips to extend the oven’s lifespan. By following the guidelines‚ users can avoid potential hazards and make the most of their cooking experience. It’s a valuable resource for both beginners and experienced cooks to achieve delicious‚ healthy meals effortlessly.
Key Features of the NuWave Oven
The NuWave Oven boasts advanced features like multi-level cooking with the extender ring‚ allowing simultaneous cooking of multiple dishes. Its digital touch screen offers precise temperature and time control‚ while the infrared and convectional heating ensures even cooking. The oven mitts and reversible rack enhance safety and versatility. Additional accessories‚ such as the Supreme Pizza Kit‚ expand cooking possibilities. These features make the NuWave Oven a versatile and efficient kitchen appliance for various cooking techniques‚ including baking‚ grilling‚ and air frying‚ catering to diverse culinary needs.

Safety Precautions
- Always read the manual before use to ensure safe operation.
- Keep children away from the oven while in use.
- Use oven mitts when handling hot components.
- Never leave the oven unattended during cooking.
- Place the oven on a stable‚ heat-resistant surface.
General Safety Guidelines
Always follow essential safety measures to ensure safe and efficient use of your NuWave Oven. Read the manual thoroughly before first use and ensure all parts are clean and dry. Avoid using metal utensils or abrasive cleaners‚ as they may damage components. Keep children away from the oven while cooking. Never leave the appliance unattended during operation. Ensure the oven is placed on a stable‚ heat-resistant surface. Regularly inspect for damage and avoid using the oven if any parts are compromised. Consult the manual for detailed safety information to prevent accidents and maintain optimal performance.
Appliance Safety Tips
Prioritize safety when using your NuWave Oven; Always wear oven mitts or use pot holders when handling hot components like the liner pan or cooking rack. Ensure the appliance is placed on a stable‚ heat-resistant surface to prevent accidental tipping. Never leave the oven unattended while in operation. Keep children away from the cooking area to avoid burns or injuries. Regularly inspect the power cord and plug for damage‚ and avoid using the oven if any parts are compromised. Follow these tips to ensure a safe and enjoyable cooking experience.
Handling Hot Components
Exercise extreme caution when handling hot components of your NuWave Oven. The liner pan‚ cooking rack‚ and dome can become extremely hot during operation. Always use oven mitts or pot holders to avoid burns when removing these parts. Allow components to cool completely before cleaning or storing. Never touch hot surfaces with bare hands‚ even after cooking is complete. Be mindful of the dome’s slight expansion when heated‚ as it may affect handling. Prioritize safety to prevent accidents and ensure a smooth cooking experience with your NuWave Oven.

Assembly and Setup
Unpack and inspect your NuWave Oven‚ ensuring all components are included. Install the dome holder securely and position the reversible rack correctly. Refer to the manual for proper assembly and setup guidance to ensure safe and optimal performance.
Unpacking and Initial Inspection
Start by carefully unpacking your NuWave Oven and verifying all components are included. Check for any damage during shipping. The package typically contains the oven base‚ power head‚ dome‚ reversible rack‚ liner pan‚ and extender ring. Before first use‚ wash the dome‚ liner pan‚ and rack in warm soapy water or run them through a dishwasher cycle. Ensure all parts are clean and dry before assembly. This step ensures hygiene and prepares your oven for safe and efficient operation.
Installing the Dome Holder
Begin by aligning the dome holder with the designated tabs on the Power Head. Gently snap it into place until it clicks securely. Ensure the dome holder is properly seated to support the dome during cooking. This step is crucial for maintaining even heat distribution and preventing accidental detachment. Once installed‚ verify the dome fits smoothly onto the holder. Refer to the manual for visual guidance if needed. Proper installation ensures safe and efficient operation of your NuWave Oven.
Positioning the Reversible Rack
Place the reversible rack inside the NuWave Oven‚ ensuring it fits securely into the designated slots. Adjust the rack to the desired height based on your recipe‚ such as 3 inches for pizza or higher for larger dishes. Make sure the rack is locked in place to prevent movement during cooking. For optimal results‚ refer to the cooking chart or recipe book for recommended rack positions. Proper positioning ensures even heat distribution and prevents food from overcrowding. Always handle the rack with oven mitts when removing it from the hot oven.

Operating Instructions
Use the control dials to set cooking time and power level according to your recipe. Adjust the reversible rack height for optimal food placement. For multi-level cooking‚ attach the extender ring. Ensure the dome is securely locked before starting. Always follow safety guidelines and refer to the cooking chart for precise settings. This ensures efficient‚ even cooking and prevents overheating. Proper operation enhances performance and safety.
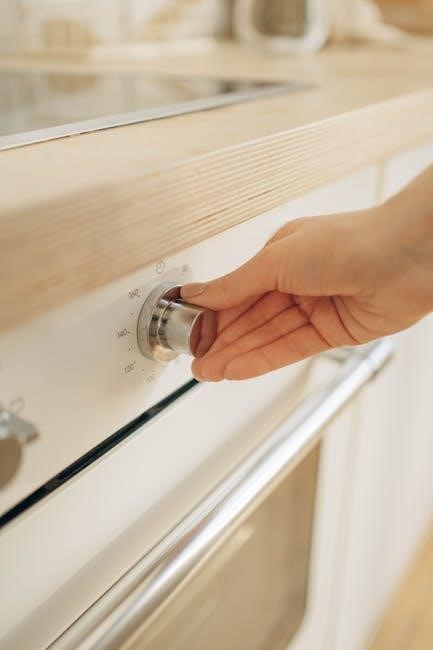
Understanding the Control Dials
The NuWave Oven features intuitive control dials that simplify cooking. The cook time dial‚ located on the front of the power head‚ allows you to set the cooking duration. The power level dial adjusts the cooking intensity‚ enabling precise control over your dishes. To operate‚ ensure the dome holder is securely locked. Always refer to the cooking chart for recommended settings. No preheating is required‚ making the process efficient. Use oven mitts when handling hot components‚ and keep the appliance clean and dry before each use for optimal performance and safety.
Setting Cooking Time and Power Level
To set cooking time and power level on your NuWave Oven‚ locate the control dials on the power head. The cook time dial allows you to set the duration‚ while the power level dial adjusts cooking intensity. Turn the dials to your desired settings‚ ensuring they align with the recommendations in the cooking chart or recipe book. No preheating is required‚ making the process quick and efficient. Always use oven mitts when handling hot components‚ and ensure the appliance is clean and dry before each use for optimal performance and safety.
Using the Extender Ring for Multi-Level Cooking
The extender ring enables multi-level cooking‚ allowing you to prepare multiple dishes simultaneously. Place the ring on the base of the oven‚ ensuring it fits securely. Position your food on the rack or directly on the ring. Adjust the cooking time and power level according to the recipe. This feature maximizes space and efficiency‚ perfect for large meals or entertaining. Always follow safety guidelines and cleaning instructions to maintain your NuWave Oven’s performance and longevity.
Cooking Techniques
Master various cooking methods with your NuWave Oven‚ from baking and grilling to air frying and dehydrating. Achieve crispy textures and flavorful results with ease and precision.
Baking in the NuWave Oven
Baking in the NuWave Oven is a breeze‚ thanks to its advanced infrared and convection heating technologies. For perfect results‚ preheat the oven if needed‚ and place your dish on the reversible rack. Use the control dials to set the ideal temperature and time for cakes‚ cookies‚ or bread. Ensure even cooking by rotating dishes halfway through. The oven’s precise heat distribution ensures crispy exteriors and moist interiors. Follow the cooking chart for specific settings‚ and let the NuWave Oven do the rest for delicious‚ professional-quality baked goods;
Grilling and Air Frying Tips
Maximize your grilling and air frying experience with the NuWave Oven. For grilling‚ use the extender ring to achieve multi-level cooking‚ ensuring even heat distribution. Pat food dry before cooking to enhance crispiness. Air frying requires minimal oil‚ offering a healthier alternative. Adjust temperature and time based on the food’s thickness and your desired crispiness. Rotate trays halfway through cooking for consistent results. Refer to the cooking chart for optimal settings. These tips ensure perfectly grilled and air-fried dishes every time‚ leveraging the oven’s advanced heating technology for delicious outcomes.
Cooking Pizza with the Supreme Pizza Kit
Transform your pizza-making experience with the Supreme Pizza Kit for your NuWave Oven. Ensure the reversible rack is positioned at 3 inches inside the oven for optimal cooking. Place your pizza on the liner pan or directly on the rack for a crispy crust. Preheat the oven to 400°F (200°C) for 5 minutes before cooking. Cook for 8-12 minutes‚ or until the crust is golden and toppings are bubbly. For thicker crusts‚ extend cooking time by 2-3 minutes. Achieve perfect results with the kit’s built-in pizza stone‚ designed to distribute heat evenly and enhance flavor. Elevate your homemade pizza game with effortless‚ restaurant-quality results!
Dehydrating Fruits and Vegetables
Dehydrate fruits and vegetables to create healthy‚ crispy snacks using your NuWave Oven. Set the temperature between 135°F and 150°F (57°C to 65°C) for optimal dehydration. Pat dry produce thoroughly before placing it in a single layer on the rack. Dehydrate for 3-6 hours‚ depending on thickness and moisture content. Monitor progress to avoid over-drying. Store dried snacks in airtight containers for freshness. This method preserves nutrients and natural flavors‚ making it a great way to enjoy seasonal produce year-round. No preheating is required for dehydration.
Maintenance and Cleaning
Regularly clean the dome‚ liner pan‚ and rack with warm soapy water or a dishwasher. Use oven mitts to handle hot components and ensure all parts are dry before reuse. Maintain your NuWave Oven by following these simple steps to preserve performance and hygiene. Cleaning ensures optimal cooking results and prevents food residue buildup. Always allow parts to cool before cleaning for safety and effectiveness. Proper maintenance extends the lifespan of your appliance and guarantees consistent cooking outcomes.
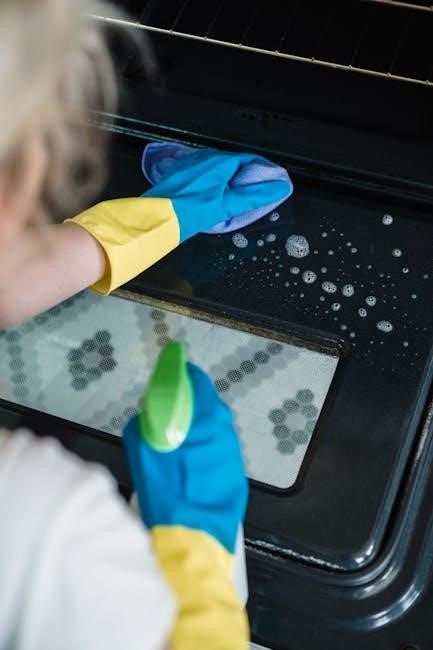
Cleaning the Dome‚ Liner Pan‚ and Rack
Regular cleaning of the dome‚ liner pan‚ and rack is essential for maintaining your NuWave Oven’s performance. Wash these parts in warm soapy water or run them through a dishwasher cycle after each use. Ensure all components are dry before reuse to prevent rust or damage. Avoid using abrasive cleaners or scouring pads‚ as they may scratch the surfaces. Always handle hot parts with oven mitts to avoid burns. Regular cleaning prevents food residue buildup and ensures optimal cooking results. For tough stains‚ soak the parts in warm water before cleaning.
Regular Maintenance Tips
Regular maintenance ensures your NuWave Oven performs optimally. After each use‚ clean the dome‚ liner pan‚ and rack to prevent food residue buildup. Check for any blockages in the air vents to maintain proper airflow. Wipe the exterior with a damp cloth‚ avoiding abrasive cleaners. Ensure the dome is securely locked after cleaning. For tougher stains‚ soak parts in warm water before scrubbing. Regularly inspect the power cord and connections for damage. Proper maintenance extends the lifespan of your appliance and ensures consistent cooking results. Always refer to the manual for detailed cleaning and safety guidelines.
Using Oven Mitts and Pot Holders
Always use oven mitts or pot holders when handling hot components like the liner pan‚ cooking rack‚ or dome. These accessories protect your hands from burns and provide a secure grip. Ensure mitts are dry before use to avoid steam burns. After cooking‚ let components cool slightly before handling. Regularly wash and maintain your mitts to prevent grease buildup. Never use damp or worn-out mitts‚ as this can reduce their insulating properties. Proper use of oven mitts and pot holders is essential for safe and efficient cooking with your NuWave Oven.
Troubleshooting
Identify and resolve common issues with your NuWave Oven using this section. Address error codes‚ power problems‚ and cooking inconsistencies. Resetting the appliance or checking connections often fixes issues. Refer to the troubleshooting guide for detailed solutions to ensure optimal performance and extend the lifespan of your oven.
Common Issues and Solutions
Addressing common issues with your NuWave Oven ensures optimal performance. Error codes often indicate specific problems‚ such as overheating or sensor malfunctions. Power issues may require resetting the appliance or checking electrical connections. Uneven cooking can be resolved by adjusting rack positions or ensuring proper air circulation. Strange noises may result from food debris; clean the oven thoroughly. For display malfunctions‚ unplug and replug the unit. Refer to the troubleshooting chart for detailed solutions. Regular maintenance‚ like cleaning the dome and liner pan‚ prevents many issues. Consult the manual or contact customer support for persistent problems.
Understanding Error Codes
Your NuWave Oven may display error codes like E1‚ E2‚ or E3‚ indicating specific issues. E1 often relates to temperature sensors‚ while E2 may signal a power failure. E3 could indicate a faulty touch screen. To resolve these‚ unplug the oven‚ wait‚ and plug it back in. If issues persist‚ refer to the error code chart in your manual. Cleaning sensors or updating software may also be necessary. Always follow the manual’s guidance for error code troubleshooting to ensure proper function and safety. Consult customer support if problems remain unresolved.
Resetting the Appliance
To reset your NuWave Oven‚ first ensure it is turned off and unplugged from the power source. Allow it to cool completely before proceeding. Plug the oven back in and press the reset button‚ usually located at the back or bottom. If no reset button is available‚ unplug the appliance for 10 minutes to reset the internal system. After resetting‚ refer to the manual to restore default settings. If issues persist‚ contact customer support for further assistance. Regular resets can help maintain optimal performance and resolve minor operational glitches.
Model-Specific Instructions
This section provides detailed guides for specific NuWave Oven models‚ including the Pro Smart Oven‚ Bravo XL‚ and Pro Plus. Each model’s unique features and operation are covered to ensure optimal performance and customization for your cooking needs.
NuWave Pro Smart Oven Guide
The NuWave Pro Smart Oven combines advanced infrared and convection technology for faster‚ healthier cooking. Its digital touchscreen allows precise temperature and time control‚ while the 12-inch capacity accommodates large meals. Special features include pre-set settings for pizza‚ roast‚ and dehydrate functions. Regular cleaning of the dome‚ liner pan‚ and rack ensures optimal performance. Always follow safety guidelines‚ such as using oven mitts when handling hot components. Refer to the manual for troubleshooting common issues and resetting the appliance if needed. This guide helps you unlock the full potential of your Pro Smart Oven for versatile and delicious cooking.
NuWave Bravo XL Smart Oven Instructions
The NuWave Bravo XL Smart Oven offers advanced cooking capabilities with its 12-inch capacity‚ ideal for large families. It combines infrared‚ convection‚ and precision temperature control for evenly cooked meals. Use the reversible rack for multi-level cooking and the extender ring for added versatility. Pre-set settings for pizza‚ roast‚ and air fry modes simplify cooking. Follow the cooking chart for optimal results and ensure the rack is positioned correctly. Clean the dome‚ liner pan‚ and rack regularly for maintenance. Always wear oven mitts when handling hot components‚ and allow parts to cool before cleaning.
NuWave Pro Plus Oven Manual
The NuWave Pro Plus Oven Manual provides detailed guidance for utilizing its advanced features. This oven uses lower temperatures to prevent food burning while promoting faster cooking. It includes a reversible rack for versatile cooking setups and an extender ring for multi-level cooking. Ensure the rack is positioned correctly‚ and refer to the cooking chart for precise settings; Regularly clean the dome‚ liner pan‚ and rack to maintain performance. Always handle hot components with oven mitts and allow them to cool before cleaning for safety. This manual ensures optimal use of your NuWave Pro Plus Oven.
Quick Start Guide
Unpack and inspect your NuWave Oven‚ ensuring all components are included. Wash the dome‚ liner pan‚ and rack before first use. Position the reversible rack at the recommended height. Set the cooking time and power level using the control dials. Refer to the cooking chart for specific settings. Start cooking—no preheating needed!
Fast Setup for First-Time Users
Begin by unpacking and inspecting your NuWave Oven to ensure all components are included. Wash the dome‚ liner pan‚ and reversible rack with warm soapy water or run through a dishwasher cycle. Dry thoroughly before use. Position the reversible rack at the recommended height‚ typically 3 inches for pizza or multi-level cooking. Familiarize yourself with the control dials for setting time and power levels. Refer to the cooking chart for specific guidelines. Plug in the oven‚ set your desired settings‚ and start cooking—no preheating required! Enjoy your first cooking experience.
Basic Cooking Steps
Place food on the reversible rack‚ ensuring proper airflow. Choose the desired power level and set the cooking time using the control dials. Press start to begin cooking. No preheating is needed‚ saving time. Use oven mitts when handling hot components. Follow the cooking chart for specific settings. Ensure the rack is at the recommended height for even cooking. Allow the oven to cool before cleaning. This straightforward process ensures optimal results for various dishes‚ from baked goods to grilled meats‚ using your NuWave Oven efficiently.
Quick Reference Chart
A handy guide for common cooking tasks‚ the Quick Reference Chart provides essential settings for power level‚ cooking time‚ and rack position. Ideal for meats‚ fish‚ vegetables‚ and baked goods. Refer to the chart for specific recommendations‚ ensuring optimal results. This chart is a convenient tool for quick meal preparation. Always follow the chart’s guidelines for best outcomes. Located in your manual‚ it offers a concise overview for everyday cooking. Use it to streamline your cooking process and achieve delicious results effortlessly with your NuWave Oven.
Congratulations! You’ve mastered your NuWave Oven. By following this manual‚ you’ve unlocked its full potential for delicious‚ healthy meals. Happy cooking!
Maximizing Your NuWave Oven Experience
To maximize your NuWave Oven experience‚ explore its versatile features and accessories. Use the extender ring for multi-level cooking‚ and try the Supreme Pizza Kit for perfect homemade pizzas. Regular maintenance‚ such as cleaning the dome and liner pan‚ ensures optimal performance. Experiment with various recipes from the included cookbook‚ and take advantage of online resources for more inspiration. By following safety guidelines and utilizing all available tools‚ you can achieve healthier‚ tastier meals effortlessly with your NuWave Oven.
Final Tips for Optimal Performance
For optimal performance‚ regularly clean the dome‚ liner pan‚ and rack to prevent food residue buildup. Always use oven mitts when handling hot components. Refer to the cooking chart for precise time and power settings. Experiment with new recipes and techniques‚ like air frying or dehydrating‚ to explore the oven’s full potential. Ensure the reversible rack is properly positioned for even cooking. By following these tips and maintaining your NuWave Oven‚ you can enjoy consistent‚ delicious results while cooking efficiently and healthily.

Resources
Access official NuWave Oven manuals‚ quick-start guides‚ and cookbooks online. Explore FAQs‚ troubleshooting tips‚ and customer support options for assistance with your appliance. Visit NuWave’s official website for comprehensive resources to enhance your cooking experience.
Accessing Official Manuals
Visit the official NuWave website to download PDF manuals and quick-start guides for your specific oven model. Models like the Bravo XL‚ Pro Plus‚ and Pro Smart Oven have dedicated resources. Find detailed instructions‚ recipes‚ and troubleshooting tips in these documents. For the Supreme Pizza Kit‚ refer to the included guide for optimal pizza cooking. Ensure you have the latest version of your manual for accurate information. If you need further assistance‚ contact NuWave customer support for personalized help.
Downloading Additional Guides
Visit the official NuWave website to download additional guides‚ including PDF manuals and quick-start guides for various models. These resources provide detailed instructions‚ recipes‚ and troubleshooting tips. Access model-specific guides for the Bravo XL‚ Pro Plus‚ and Pro Smart Oven. For the Supreme Pizza Kit‚ download the dedicated guide for optimal pizza cooking. Ensure you have the latest version for your specific model by entering your product number. These guides are free and available for immediate download to enhance your cooking experience with NuWave products.
FAQs and Customer Support
Visit the official NuWave website for a comprehensive FAQ section addressing common questions about your oven’s operation‚ maintenance‚ and troubleshooting. For further assistance‚ contact Customer Support directly through the website or phone. Additionally‚ access How-To Videos for visual guides on using your appliance. Register your product online for warranty claims and exclusive benefits. The NuWave support team is available to help resolve issues and provide expert advice‚ ensuring your cooking experience remains seamless and enjoyable.
No Responses