
Welcome to the NuWave of Cooking! This manual provides detailed instructions and images to help you master your NuWave Oven Pro Plus․ It includes tips‚ recipes‚ and guidelines to ensure safe and effective use‚ empowering you to create delicious meals effortlessly․
1․1 Overview of the NuWave Oven
The NuWave Oven Pro Plus is a revolutionary kitchen appliance that combines conduction‚ convection‚ and infrared cooking technologies for faster‚ healthier‚ and more efficient meal preparation․ Designed to help users “Live Well for Less‚” it offers a versatile cooking experience with features like multi-level cooking and a delay function․ This countertop oven is ideal for cooking a variety of dishes‚ from roasted meats to baked desserts‚ while promoting even cooking and minimizing food burn; Its compact design and user-friendly interface make it perfect for both novice cooks and culinary experts․
1․2 Key Features of the NuWave Oven Pro Plus
The NuWave Oven Pro Plus stands out with its advanced features‚ including a digital control panel‚ precise temperature control‚ and a delay function for convenient meal planning․ It also includes an extender ring for multi-level cooking‚ allowing users to cook multiple dishes simultaneously․ The oven’s infrared technology ensures faster cooking times while retaining moisture and flavor․ Additional features like dishwasher-safe parts and a reversible rack enhance usability and cleanup․ These features make the Pro Plus a versatile and efficient addition to any kitchen‚ catering to a wide range of cooking needs․

Safety Precautions and Warnings
Always read the manual before use․ Avoid improper installation or operation․ Keep children away and never open the dome while cooking to prevent burns․ Ensure the oven is placed on a stable‚ heat-resistant surface and avoid using it near water or flammable materials․
2․1 Important Safeguards for Safe Use
Read this manual thoroughly before using your NuWave Oven․ Ensure all safety precautions are understood to avoid accidents․ Never use the oven for purposes other than cooking‚ and avoid modifying or tampering with its components․ Keep children away from the appliance while in operation․ Do not place the oven near flammable materials or water sources․ Always ensure the oven is placed on a stable‚ heat-resistant surface․ Follow electrical safety guidelines‚ and avoid using the oven simultaneously with other high-power appliances to prevent electrical overload․
2․2 Avoiding Burns and Injuries
Always exercise caution when handling hot components of the NuWave Oven․ Use oven mitts or tongs to avoid direct contact with heated surfaces․ Keep children away from the oven while it is in operation․ Never open the dome or remove the power head while cooking‚ as this can cause severe burns․ Ensure the oven is placed on a stable surface to prevent tipping․ Avoid touching the exterior during or after cooking‚ as it may become extremely hot․ Proper ventilation is also essential to prevent steam burns when opening the dome after cooking․
2․3 Proper Placement and Usage Guidelines
Place the NuWave Oven on a heat-resistant‚ flat surface away from flammable materials․ Ensure at least 6 inches of clearance on all sides for proper airflow․ Avoid placing the oven near water sources or in humid environments․ Do not operate the oven outdoors or in areas with extreme temperatures․ Always use the oven on a stable‚ even surface to prevent tipping․ Keep the power cord away from hot surfaces and never submerge electrical components in water․ Follow these guidelines to ensure safe and efficient operation of your NuWave Oven․
Assembly and Setup
Begin by unboxing and inspecting all components․ Wash the Dome‚ Liner Pan‚ Base‚ and Rack in soapy water or run through a dishwasher cycle before first use․
3․1 Unboxing and Initial Inspection

Start by carefully unboxing your NuWave Oven Pro Plus․ Verify that all components are included: Dome‚ Liner Pan‚ Base‚ Power Head‚ Cooking Rack‚ and Extender Ring․ Inspect each part for damage or defects․ Ensure all accessories are accounted for to ensure proper assembly and functionality․ If any item is missing or damaged‚ contact NuWave customer support immediately․ This step ensures a smooth setup process and prevents potential issues during operation․
3․2 Step-by-Step Assembly Guide
Begin by placing the Power Head on the rim of the Dome and locking it by rotating clockwise until secure․ Next‚ position the Liner Pan inside the Base‚ ensuring handles are fully dropped for proper fit․ Place the Dome with the Power Head over the Base‚ aligning it with the Liner Pan․ If using the Extender Ring‚ attach it snugly under the Dome for multi-level cooking․ Verify all components are properly aligned and secured before use․ This ensures safe and efficient operation of your NuWave Oven․
3․3 Attaching the Dome and Power Head
To attach the Dome and Power Head‚ place the Power Head on the rim of the Dome․ Rotate it clockwise until the locking lugs click into place‚ ensuring a secure connection․ Once locked‚ the Dome and Power Head assembly can be lifted and moved safely․ Always verify that the Power Head is tightly locked to avoid any shifting during cooking․ This step is crucial for proper operation and safety of your NuWave Oven․
3․4 Using the Extender Ring for Multi-Level Cooking
The Extender Ring allows for multi-level cooking‚ expanding your NuWave Oven’s capacity․ Place the 3-inch ring snugly under the Dome‚ ensuring proper alignment․ When correctly fitted‚ it enables cooking on multiple levels without compromising performance․ Always verify the ring’s position to avoid improper fit‚ which could affect cooking efficiency․ This feature is ideal for preparing various dishes simultaneously‚ enhancing your cooking versatility and convenience․

Operating Instructions
Master your NuWave Oven with simple operating instructions․ Learn to use the control panel‚ set cooking time and temperature‚ and handle parts safely․ Explore advanced features for perfect results!
4․1 Understanding the Control Panel
The NuWave Oven’s control panel is designed for intuitive operation․ It features a digital display and buttons for setting time‚ temperature‚ and power levels․ The panel allows you to adjust cooking settings precisely‚ ensuring optimal results․ Use the dial to select your desired cooking time and temperature‚ and press the start button to begin․ The LED display will show your selections‚ and the oven will automatically adjust to the set parameters․ Familiarize yourself with each function to make the most of your cooking experience․
4․2 Setting Cooking Time and Temperature
To set the cooking time and temperature‚ use the control dial to select your desired settings․ The digital display will show the chosen time and temperature․ Press the start button to begin cooking․ Ensure the temperature is set according to your recipe for optimal results․ The oven allows precise adjustments‚ so refer to the recipe guide for specific recommendations․ Always set the time and temperature before starting to ensure safe and efficient cooking․ This feature helps achieve perfectly cooked meals every time․
4․3 Using the Delay Function
The delay function allows you to schedule cooking in advance․ After setting the temperature and time‚ press the delay button․ The display will show the delay time‚ which can be adjusted using the control dial․ The oven will start cooking automatically at the set time․ This feature is ideal for meal planning and ensures your dish is ready when you need it․ Note that the delay function only affects the cook time‚ not the temperature setting․
4․4 Converting Between Fahrenheit and Celsius
To convert between Fahrenheit and Celsius‚ press and hold the Cook Temp button for 3 seconds․ The LED display will flash “TEMP” and show 350°F or 175°C․ Use the control dial to adjust the temperature‚ and the oven will automatically switch between units․ The default setting is Fahrenheit‚ but this feature allows flexibility for recipes using Celsius․ Ensure the temperature is set correctly before starting to cook for accurate results․ This function is convenient for users who prefer metric or imperial measurements․ Always confirm the unit before cooking to avoid errors․

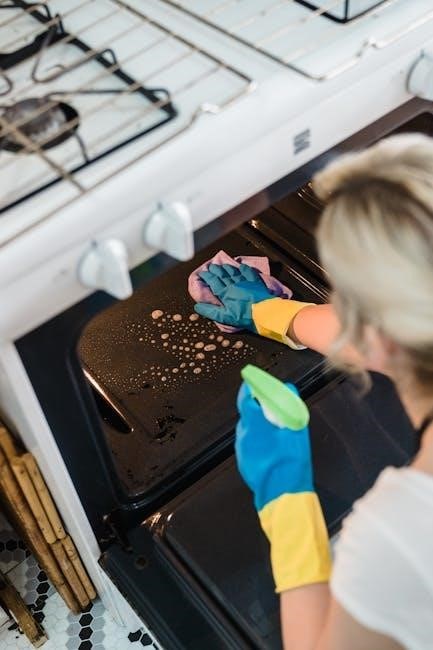
Cleaning and Maintenance
Before first use‚ wash Dome‚ Liner Pan‚ Base‚ and Rack in soapy water or run through a dishwasher․ Regular cleaning ensures optimal performance and hygiene․ Always wipe the exterior carefully after use to maintain its appearance and functionality․
5․1 Cleaning the Dome‚ Liner Pan‚ and Base
Before first use‚ wash the Dome‚ Liner Pan‚ Base‚ and Cooking Rack in warm soapy water or run them through a dishwasher cycle․ For daily cleaning‚ wipe the Dome with a soft cloth and mild soap․ The Liner Pan can be cleaned with a dishwasher or scrubbed lightly․ The Base should be wiped with a damp cloth after each use to prevent food residue buildup․ Regular cleaning ensures optimal performance and maintains the oven’s hygiene and efficiency․ Always dry components thoroughly to prevent water spots․
5․2 Deep Cleaning the NuWave Oven
Deep clean your NuWave Oven every 1-2 months for optimal performance․ Remove racks and wash them in soapy water or run through a dishwasher․ For the Dome‚ mix equal parts water and vinegar in the Liner Pan‚ set to 350°F for 15 minutes․ Let cool‚ then wipe clean with a soft cloth․ The Base can be wiped with a damp cloth․ Regular deep cleaning removes tough stains and food residue‚ ensuring efficient cooking results and maintaining your oven’s longevity․ Always dry components thoroughly after cleaning to prevent water spots․
5․3 Dishwasher-Safe Parts and Instructions
Most NuWave Oven parts‚ such as the Dome‚ Liner Pan‚ Base‚ and Cooking Rack‚ are dishwasher-safe for easy cleaning․ Place these components on the upper rack of your dishwasher for optimal results․ Avoid submerging the Power Head in water or placing it in the dishwasher‚ as this may damage electrical components․ For exterior cleaning‚ wipe with a damp cloth․ Regular dishwasher cleaning helps maintain hygiene and functionality․ Always ensure parts are dry before reassembling to prevent water spots and ensure proper operation․
Cooking Instructions and Tips
Optimize your cooking results with expert tips on rack placement‚ power level adjustments‚ and techniques to prevent burning․ Explore multi-level cooking with the extender ring for versatile meals․
6․1 Recommended Rack Heights for Different Foods
For optimal cooking‚ use the reversible rack at different heights based on food type․ Place larger items like whole chickens or roasts on the lower rack‚ while smaller dishes like seafood or vegetables benefit from the upper rack․ The rack adjusts to three levels‚ ensuring even cooking․ Use the 3-inch rack for pizza‚ the 4-inch for meats‚ and the 5-inch for multi-level cooking․ Adjusting the rack height ensures proper air circulation and prevents overcrowding‚ promoting consistent results․ Always refer to the recipe guidelines for specific rack height recommendations․
6․2 Adjusting Power Levels for Optimal Cooking
Adjusting power levels on your NuWave Oven ensures tailored cooking for various foods․ Lower power levels (1-3) are ideal for delicate items like fish or vegetables‚ while medium levels (4-6) suit baked goods and casseroles․ Higher levels (7-10) are best for meats‚ crisping‚ or frying․ Use the correct power to avoid undercooking or burning․ Always consult the recipe guide for specific power recommendations to achieve perfect results for your dishes․
6․3 Preventing Food from Burning
To prevent food from burning in your NuWave Oven‚ monitor cooking progress and use the recommended power levels․ Place food in a single layer on the rack and avoid overcrowding․ Use the liner pan for messy foods to catch drips and prevent burning․ Flip or rotate food halfway through cooking‚ especially for items like fries or snacks; Adjust power levels based on food type; lower levels for delicate items and higher for browning․ Always preheat when necessary and follow recipe guidelines for optimal results․

Common Issues and Troubleshooting
Address power issues by checking the outlet and ensuring proper connections․ For error messages‚ refer to the manual or contact NuWave customer support for assistance․
7․1 Resolving Power Issues
If your NuWave Oven isn’t turning on‚ check the power outlet and ensure it’s properly plugged in․ Verify that no other high-power appliances are sharing the same circuit‚ as this can cause voltage drops․ If the issue persists‚ unplug the oven‚ wait 30 seconds‚ and plug it back in․ This reset often resolves electrical glitches․ For persistent power problems‚ contact NuWave customer support for assistance․ Always ensure the oven is used on a dedicated circuit to maintain optimal performance․
7․2 Fixing Error Messages
If your NuWave Oven displays an error message‚ press and hold the Cook Time dial for 3 seconds to reset the system․ Ensure the Dome is securely locked and the power head is properly aligned․ If the issue persists‚ unplug the oven‚ wait 30 seconds‚ and plug it back in․ Refer to the manual for specific error code meanings․ For unresolved issues‚ contact NuWave customer support at 1-877-689-2838 for further assistance․ Always follow these steps to resolve errors efficiently and safely․
7․3 Addressing Uneven Cooking
To address uneven cooking‚ ensure the Dome is properly placed and aligned with the Base․ Check that the Extender Ring is securely fitted and not obstructing airflow․ Adjust the power level and rack height according to the recipe․ Rotate food halfway through cooking for consistent results․ Ensure the Dome is clean‚ as residue can block infrared heat․ If issues persist‚ refer to the troubleshooting guide or contact customer support for assistance․ Proper setup and maintenance are key to achieving even cooking results․
Recipe Ideas and Time-Saving Tips
Discover delicious recipes like Homemade Granola‚ Baked BBQ Ribs‚ and Rustic Italian Pizza․ Use the Extender Ring for multi-level cooking and adjust rack heights for optimal results․ Explore time-saving hacks to prepare meals quickly while maintaining flavor and nutrition․
8;1 Popular Recipes for the NuWave Oven
Popular recipes include Homemade Granola‚ Baked BBQ Ribs‚ Rustic Italian Pizza‚ and Chocolate Cupcakes with Swirl Frosting․ The NuWave Oven excels at air frying‚ baking‚ and dehydrating‚ offering healthy‚ flavorful meals․ Use the Extender Ring for multi-level cooking to prepare dishes like roasted vegetables or grilled meats simultaneously․ Achieve crispy textures with minimal oil‚ making it ideal for snacks like fries or chicken wings․ Explore these recipes to maximize your cooking experience and enjoy gourmet meals with ease․
8․2 Healthy Meal Options
Healthy meal options with the NuWave Oven include baked chicken‚ salmon‚ and steamed vegetables․ Use the air fryer function for crispy‚ low-oil meals like sweet potato fries or cauliflower bites․ The dehydrate function is perfect for making healthy snacks like fruit leather or jerky․ Achieve balanced nutrition with quick‚ easy recipes that preserve flavors and nutrients․ Explore these options to create delicious‚ wholesome dishes that cater to various dietary needs and preferences‚ ensuring a healthier lifestyle with minimal effort․
8․3 Quick Cooking Hacks
Maximize your NuWave Oven with these quick cooking hacks! Use the delay function to start cooking at the perfect time․ Preheat the oven in minutes for faster results․ For crispy textures‚ pat food dry before air frying․ Layer cooking racks to prepare multiple dishes simultaneously․ Quickly reheat leftovers without overcooking by using short intervals․ Experiment with preset functions like sear or roast for enhanced flavors․ These hacks streamline your cooking process‚ saving time while delivering delicious outcomes․ Explore these tips to enhance your culinary experience with the NuWave Oven!
Warranty and Customer Support
Your NuWave Oven is backed by a comprehensive warranty․ For inquiries or assistance‚ contact NuWave‚ LLC at 1-877-689-2838 or email help@nuwavenow․com․ Ensure proper use to maintain warranty validity․
9․1 Understanding Your Warranty
Your NuWave Oven is protected by a comprehensive warranty covering defects in materials and workmanship․ The warranty period varies by product‚ typically one year for parts and labor․ Registration may be required for full coverage․ Misuse‚ tampering‚ or unauthorized repairs void the warranty․ For claims‚ contact NuWave‚ LLC at 1-877-689-2838 or help@nuwavenow․com․ Keep your proof of purchase for warranty validation․ NuWave stands behind its products‚ ensuring your satisfaction and hassle-free service․
9․2 Contacting NuWave Customer Service
For assistance with your NuWave Oven‚ reach out to our dedicated customer service team․ Call toll-free at 1-877-689-2838‚ Monday through Friday‚ or email help@nuwavenow․com․ Visit our website for live chat support‚ FAQs‚ and troubleshooting guides․ Ensure to have your model number and proof of purchase ready for expedited service․ NuWave is committed to providing prompt and effective support to ensure your satisfaction and optimal product performance;
Master your NuWave Oven with confidence! Enjoy exploring recipes‚ tips‚ and features to create delicious‚ gourmet meals․ Happy cooking with your versatile and efficient NuWave Oven!
10․1 Final Tips for Getting the Most Out of Your NuWave Oven
Experiment with power levels and cooking times to optimize results․ Use the extender ring for multi-level cooking to maximize space․ Clean the oven regularly to maintain performance and hygiene․ For even cooking‚ ensure food is evenly spaced and racks are properly positioned․ Avoid overcrowding to prevent undercooked areas․ Don’t hesitate to explore new recipes and adjust settings for perfect outcomes․ Happy cooking!
10․2 Encouragement to Explore More Recipes
Expand your culinary horizons with the NuWave Oven! Its versatility allows you to create a wide variety of dishes‚ from hearty main courses to delicious desserts․ Try experimenting with new flavors and ingredients to discover your favorite recipes․ Whether you prefer healthy meals‚ quick snacks‚ or gourmet dishes‚ the NuWave Oven makes cooking easy and enjoyable․ Don’t hesitate to explore beyond the basics—your creativity is the limit! Happy cooking and bon appétit!
No Responses