
Viking Self Cleaning Oven Instructions: A Comprehensive Guide
Navigating your Viking oven’s self-clean feature requires understanding its intricacies, ensuring safety, and proper preparation. This guide details initiating, monitoring, and troubleshooting the cycle, alongside post-clean procedures.
Addressing potential issues like door lock malfunctions, smoke, or unusual odors is crucial for optimal performance and longevity of your appliance.
Understanding Your Viking Oven’s Self-Clean Cycle
The self-clean cycle on your Viking oven utilizes extremely high temperatures – exceeding 880°F (470°C) – to incinerate food residue into ash. This process eliminates the need for manual scrubbing and harsh chemical cleaners. However, it’s vital to understand that this isn’t a ‘set it and forget it’ function.
Viking ovens employ a door-locking mechanism during the self-clean cycle for safety, preventing accidental opening while the interior reaches scorching temperatures. The cycle duration varies depending on the selected clean level and accumulated soil, typically ranging from 2 to 4 hours, followed by a cool-down period.
Crucially, the self-clean function isn’t a substitute for regular oven maintenance. Removing large food debris before initiating the cycle minimizes smoke and odors. Some manufacturers acknowledge a ‘dirty little secret’ – frequent self-cleaning can potentially shorten the lifespan of oven components, so judicious use is recommended. Understanding these nuances ensures effective and safe operation of your Viking oven’s self-clean feature.
Remember to consult your specific model’s manual for detailed instructions and recommendations.
Safety Precautions Before Self-Cleaning
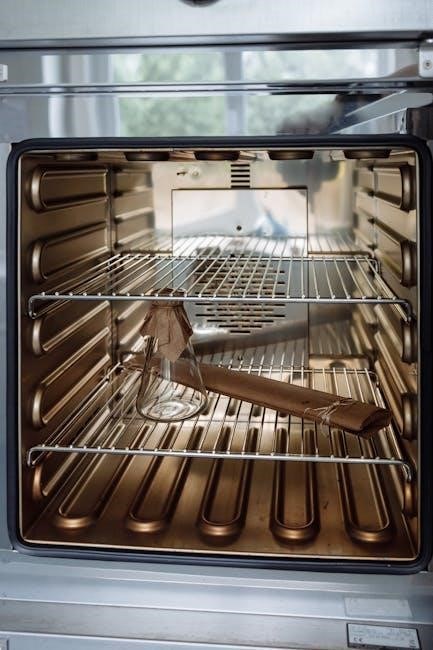
Prior to initiating the self-clean cycle on your Viking oven, several critical safety precautions must be observed. Firstly, remove all oven racks, baking stones, and any other cookware from the interior. These items can become discolored or damaged at the high temperatures reached during the cycle.
Ensure the kitchen is well-ventilated. The self-clean process can generate odors and potentially some smoke, even with a properly functioning oven. Open windows or use exhaust fans to maintain air quality. Keep children and pets away from the oven during the entire cycle, as the exterior surfaces become extremely hot.
Inspect the oven door seal for any damage. A compromised seal can allow heat and fumes to escape. Never attempt to force the door open during the self-clean cycle; the locking mechanism is designed to prevent this. If the oven fails to lock correctly, do not proceed with the self-clean function and consult a qualified technician. Prioritizing these steps ensures a safe self-cleaning experience.
Preparing Your Oven for the Self-Clean Cycle
Thorough preparation is key to a successful Viking oven self-clean. Begin by manually removing any large food debris or spills from the oven floor. While the self-clean cycle handles baked-on residue, large pieces can create excessive smoke and odors. Wipe down the oven interior with a damp cloth to remove loose particles, but avoid using oven cleaners beforehand – they can react with the high heat.
Crucially, remove all oven racks, broiler pans, and any other accessories. These items won’t withstand the extreme temperatures and could warp or discolor. Check the oven floor for any foil or plastic items that may have been inadvertently left behind. Ensure the oven door closes securely and the latch engages properly.
Finally, confirm the kitchen is adequately ventilated. Open windows or activate the range hood to dissipate any potential fumes. A little pre-cleaning effort significantly improves the self-clean cycle’s effectiveness and minimizes unpleasant smells.
Initiating the Self-Clean Cycle
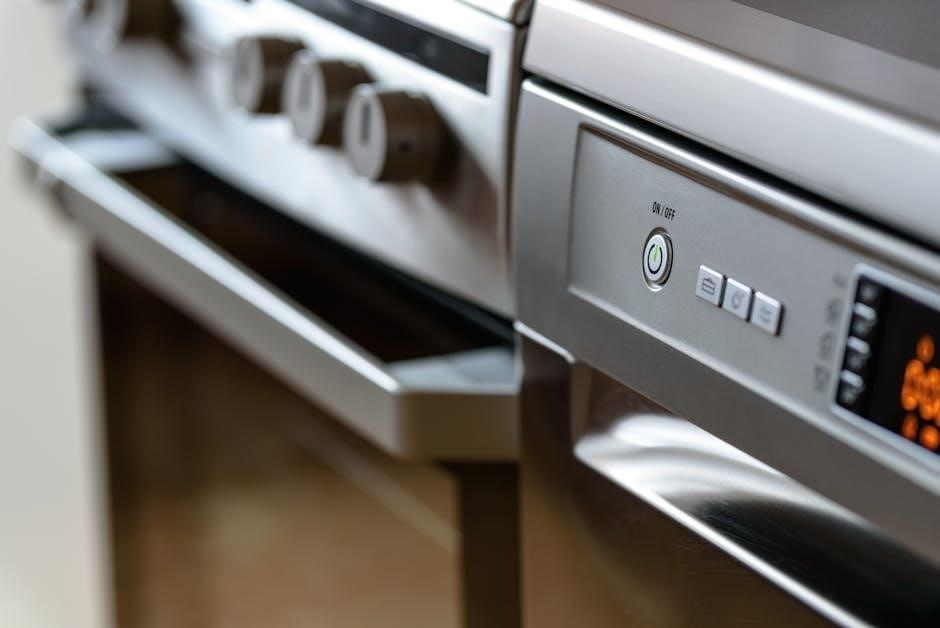
To begin the self-clean cycle on your Viking oven, first ensure the oven is completely empty and prepared as outlined previously. Locate the self-clean control knob, typically found on the control panel. Turn the knob to the “Self-Clean” setting. The oven door will automatically lock, and a red indicator light will illuminate, signaling the cycle’s commencement.
Depending on your model, you may have options to select a cleaning duration. Some Viking ovens offer a light, medium, or heavy clean setting, adjusting the cycle length accordingly. If your oven doesn’t offer these options, it will default to a standard cleaning time.
Once the door is locked, the oven will begin to heat up to extremely high temperatures. Do not attempt to open the door during this process; the lock is a safety feature. The self-clean cycle is now active, and the oven will automatically manage the cleaning process.
Self-Clean Cycle Duration and Monitoring
The duration of a Viking oven’s self-clean cycle varies, typically ranging from 2 to 4 hours, depending on the selected intensity (if available) and the level of soil within the oven. During the cycle, avoid opening the oven door, as this disrupts the high-temperature cleaning process and could pose a safety hazard.
While the oven is self-cleaning, it’s normal to notice a burning smell, which is residue being incinerated. However, excessive smoke warrants investigation (see troubleshooting section). Monitor the cycle from a safe distance, ensuring adequate ventilation in the kitchen.
The oven’s control panel will usually display a countdown timer indicating the remaining cycle time. Once the cycle is complete, the oven will automatically cool down, and the door lock will release. A beep or audible signal may indicate the cycle’s end. Allow the oven to cool completely before proceeding with post-clean procedures.
Troubleshooting Common Self-Clean Issues
Encountering problems during the self-clean cycle is common. Issues range from the oven failing to start, a stuck door lock, smoke, or unusual smells. Careful diagnosis is key.
Oven Won’t Start Self-Clean Cycle
If your Viking range’s self-clean cycle refuses to initiate despite the red light illuminating on the self-clean knob, a thorough inspection of the door lock mechanism is paramount. The oven is designed with a safety interlock; it won’t commence cleaning unless the door is securely latched. Begin by visually confirming that nothing obstructs the door’s complete closure.

Next, carefully examine the door switch and latch assembly. A faulty switch can prevent the oven from recognizing a locked door, halting the cycle before it begins. If the latch appears damaged or misaligned, it may not fully engage, triggering the safety mechanism. Gently attempt to manually engage the latch, observing if it clicks firmly into place.
Furthermore, verify the oven’s control board is functioning correctly. Electrical issues or a malfunctioning control board can disrupt the self-clean process. If you’re uncomfortable with electrical diagnostics, it’s best to consult a qualified Viking appliance repair technician. Remember, attempting repairs without proper knowledge can be hazardous. A professional can accurately diagnose the problem and restore your oven’s self-cleaning functionality.
Red Light On, But Self-Clean Won’t Engage
Encountering a lit red self-clean indicator light without the cycle actually starting is a common, yet frustrating, issue with Viking ovens. This typically signals a problem after the initial safety checks pass – meaning the door latch isn’t the primary culprit. The issue often lies within the oven’s internal components responsible for initiating the high-heat cleaning process.
A primary suspect is the oven’s control board. It’s the brain of the operation, and a malfunction can prevent the self-clean function from engaging, even with the indicator light illuminated. Another potential cause is a faulty temperature sensor. The oven relies on accurate temperature readings to safely execute the self-clean cycle; a faulty sensor can halt the process as a safety precaution.
Before calling a technician, ensure the oven has completely cooled down. Sometimes, residual heat can interfere with the cycle’s start. If the problem persists, professional diagnosis is recommended. Dealing with oven control boards and sensors requires specialized knowledge and tools. Attempting DIY repairs without expertise could lead to further damage or safety hazards.
Door Lock Mechanism Problems During Self-Clean
The Viking oven’s self-clean cycle relies heavily on a functioning door lock mechanism for safety. If the door doesn’t lock securely, the cycle won’t initiate. Conversely, if the door locks during a cycle and then won’t release afterward, it presents a significant concern. This often stems from a faulty door latch or the associated switch.
Initially, visually inspect the latch for any obstructions or damage. Ensure nothing is preventing it from fully engaging. If the latch appears intact, the door switch might be the issue. This switch confirms to the control board that the door is securely locked. A malfunctioning switch can falsely indicate an unlocked door, halting the cycle or preventing release.
Testing the switch with a multimeter (by a qualified individual) can determine its functionality. Replacement is often necessary if it’s faulty. Never attempt to force the door open during a self-clean cycle, even if it seems stuck. This could damage the locking mechanism and potentially cause injury. Professional assistance is recommended for complex lock issues.
Smoke During the Self-Clean Cycle ౼ Causes & Solutions
Experiencing smoke during a Viking oven’s self-clean cycle is relatively common, but understanding the cause is crucial. Typically, smoke arises from the burning of food residue, grease splatters, and spills accumulated within the oven cavity. The high temperatures of the self-clean cycle – often exceeding 900°F – vaporize these substances, sometimes producing visible smoke.
However, excessive or dark smoke warrants investigation. A significant buildup of grease, particularly on the oven floor or around heating elements, can contribute to heavier smoke production. Before initiating the cycle, manually remove large debris and loose food particles. Ensure proper ventilation by opening windows or using the kitchen exhaust fan.
If smoke persists despite pre-cleaning, a potential issue with the oven’s heating elements could be the culprit. A malfunctioning element might overheat, causing excessive burning. Discontinue the cycle immediately and consult a qualified technician. Never ignore persistent or unusually colored smoke, as it could indicate a more serious problem.
Unusual Odors During Self-Clean
Detecting unusual odors during your Viking oven’s self-clean cycle is a common concern, often stemming from the intense heat breaking down accumulated food residue. A faint, chemical-like smell is typical as the high temperatures vaporize grease and spills. However, strong, acrid, or burning plastic odors signal a potential problem requiring immediate attention.
Mild odors usually dissipate as the cycle progresses and with subsequent ventilation. Ensure adequate airflow by opening kitchen windows or activating the exhaust fan. However, a persistent, harsh smell could indicate burning wiring insulation or components within the oven. Immediately stop the self-clean cycle and disconnect the oven’s power supply.
Investigate for any visible signs of damage or melting near the heating elements or control panel. Do not attempt to repair electrical issues yourself; contact a certified Viking appliance technician. Ignoring unusual odors could lead to further damage or pose a fire hazard. Preventative cleaning between self-clean cycles minimizes residue buildup and reduces odor intensity.
Post-Self-Clean Procedures
Following the self-clean cycle, allow ample cool-down time before handling. Wipe away any remaining ash residue, inspect oven racks, and ensure proper ventilation for optimal results.
Cool-Down Period After Self-Cleaning
Allowing sufficient cool-down time after the self-clean cycle is paramount for both safety and the effective removal of ash residue. Viking ovens reach extremely high temperatures during this process, and attempting to open the door prematurely can result in severe burns. The door lock mechanism is designed to prevent accidental opening until the internal temperature has decreased to a safe level.
Typically, a cool-down period of at least one hour is recommended, though it can extend to several hours depending on the cycle’s duration and the oven’s model. Avoid touching any interior surfaces until they are completely cool to the touch. The oven control panel will indicate when the door lock has disengaged, signaling that it’s safe to proceed.
Resist the urge to force the door open if it remains locked. This could damage the locking mechanism and potentially void your warranty. Patience during this phase is crucial. Once the door unlocks, carefully inspect the oven’s interior for any remaining debris or unusual conditions before proceeding with the final cleaning steps. A thorough cool-down ensures a safe and efficient post-clean experience.
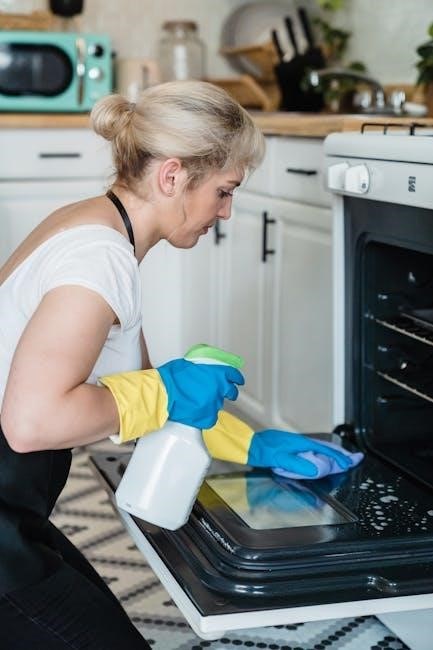
Wiping Away Ash Residue
After the cool-down period and once the door unlocks, a fine layer of ash residue will likely remain inside the oven. This is a normal byproduct of the self-clean cycle, consisting of carbonized food particles and grease. It’s essential to remove this residue for optimal oven performance and to prevent lingering odors.
Use a damp, soft cloth or sponge to carefully wipe down all interior surfaces, including the oven floor, walls, and door. Avoid abrasive cleaners or scouring pads, as these can damage the enamel coating. For stubborn residue, a paste of baking soda and water can be gently applied and then wiped clean.
Pay particular attention to the areas around the heating elements and the oven door seal. Ensure no ash is left in these critical areas. Dispose of the collected ash properly. A final wipe-down with a clean, damp cloth will ensure a spotless finish. This step completes the self-clean process, leaving your Viking oven fresh and ready for use.
Checking Oven Racks and Components
Following the self-clean cycle and ash removal, a thorough inspection of the oven racks and internal components is vital. The intense heat can sometimes affect these parts, and identifying any issues early prevents further complications.
Remove the oven racks and examine them for any discoloration, warping, or damage to the coating. While some discoloration is normal, significant warping may indicate the need for replacement. Clean the racks with a mild detergent and water, ensuring they are completely dry before reinserting them.
Inspect the oven’s heating elements (broiler and bake) for any signs of damage, such as cracks or breaks; Also, check the temperature probe (if applicable) for proper functionality. Ensure the door seal is intact and provides a tight closure. If any components appear damaged, consult a qualified Viking appliance technician for repair or replacement. Regular checks contribute to the longevity and safe operation of your oven.
Ventilation After Self-Clean
Adequate ventilation is paramount after completing a self-clean cycle in your Viking oven. The high temperatures generate fumes and odors that, while generally harmless, can be irritating and linger if not properly dispersed. Prioritize a well-ventilated kitchen environment for both your comfort and appliance health.
Immediately after the cool-down period, open windows and doors to create cross-ventilation. Activate your kitchen exhaust fan or range hood to draw out any remaining fumes. Continue this ventilation process for at least 15-30 minutes, or longer if odors persist.
Consider running the exhaust fan for a longer duration, even after the initial odor dissipates, to ensure complete air exchange. Avoid remaining in the kitchen for extended periods while ventilation is underway, especially if you are sensitive to smells. Proper ventilation safeguards indoor air quality and contributes to the overall well-being of your household following the self-clean process.
Viking Oven Door Switch and Latch Issues
A malfunctioning door switch or latch prevents the self-clean cycle from initiating, as safety is paramount. Testing and potentially replacing these components is often necessary for proper function.
Testing the Oven Door Switch
Before attempting any repairs, disconnect the power supply to your Viking oven to ensure safety. The oven door switch, crucial for the self-clean cycle, is typically located near the door latch mechanism. Accessing it may require removing the oven’s control panel or lower access panel – consult your Viking oven’s service manual for specific instructions.
Using a multimeter set to continuity, carefully test the switch. With the door open, the switch should not show continuity. When the door is firmly closed, the switch should exhibit continuity. If the switch fails either of these tests, it indicates a faulty component requiring replacement.
Visually inspect the switch for any signs of damage, such as cracks or corrosion. A damaged switch must be replaced. If you are uncomfortable performing these tests or repairs yourself, it is highly recommended to contact a qualified appliance technician. Incorrectly testing or replacing the door switch can lead to further issues or safety hazards. Remember, a functioning door switch is essential for the self-clean cycle to operate safely and effectively.
Always prioritize safety and consult the service manual before proceeding.

Replacing a Faulty Oven Door Latch
A malfunctioning oven door latch prevents the self-clean cycle from initiating, as it’s critical for securely locking the door. Begin by disconnecting power to the Viking oven. Accessing the latch usually involves removing screws from the oven door frame and potentially the inner door panel – refer to your model’s service manual for precise guidance.
Once accessed, carefully detach the old latch, noting its orientation and how it connects to the door and oven frame. Install the new latch, ensuring it aligns correctly and engages smoothly with the strike plate. Secure it with the original screws, avoiding over-tightening.
After installation, test the latch’s functionality by manually closing the oven door and verifying it locks securely. Reconnect the power and attempt to initiate the self-clean cycle to confirm the repair. If the latch still fails to engage, double-check the alignment and connections. If you lack experience with appliance repair, consult a qualified technician to avoid potential damage or safety risks. A properly functioning latch is vital for safe operation.
Prioritize safety and consult the service manual throughout the process.
Door Lock Not Engaging Properly
If your Viking oven door isn’t locking during the self-clean cycle, several factors could be at play. First, ensure nothing obstructs the door’s closing path – check for cookware or debris. A faulty door switch is a common culprit; it signals the control board when the door is securely closed. Test the switch for continuity using a multimeter, replacing it if necessary.
The door latch mechanism itself may be worn or damaged, preventing proper engagement. Inspect the latch for cracks or misalignment, and replace it if needed. A weak or broken latch spring can also hinder locking. Verify the strike plate, where the latch engages, is clean and undamaged.
Sometimes, the oven control board may misinterpret signals, preventing lock activation. This requires professional diagnosis. Before attempting repairs, disconnect power. If issues persist after checking these components, consult a qualified Viking appliance technician. A secure door lock is paramount for safe self-cleaning operation, preventing heat escape and potential hazards.
Remember to prioritize safety and consult the service manual.

Advanced Troubleshooting & Maintenance
Delving into control board diagnostics and potential electrical issues demands expertise. Preventative maintenance, like regular cleaning, extends self-clean functionality. Debunking myths ensures informed appliance care and longevity.
Understanding Oven Control Boards
The Viking oven’s control board is the central nervous system, orchestrating all functions, including the self-clean cycle. It receives input from sensors – temperature, door switch, and timer – and translates them into commands for heating elements, the door lock mechanism, and the fan. A malfunctioning control board can manifest in various ways, from a complete failure to initiate the self-clean cycle to erratic temperature control during the process.
Identifying the specific control board model is crucial for replacement. Viking ovens utilize different boards depending on the model year and features. These boards are complex electronic assemblies, and attempting repairs without proper training and equipment is strongly discouraged. Damage to the board or improper installation can lead to further issues and potential safety hazards.
Common control board failures related to the self-clean cycle include relay failures (preventing power from reaching components), sensor malfunctions (providing incorrect data), and software glitches. Diagnostic testing, often requiring a multimeter and specialized knowledge, can pinpoint the source of the problem. Always disconnect power to the oven before accessing or inspecting the control board. Professional diagnosis and repair are highly recommended for this component.
Potential Electrical Issues & Safety
Self-cleaning cycles demand significant power, increasing the risk of electrical issues. A dedicated 240V circuit is essential for Viking ovens; overloading can trip breakers or, worse, cause wiring damage. Never attempt self-cleaning if you suspect a faulty electrical connection or damaged power cord. Always ensure the oven is properly grounded.
High temperatures generated during self-clean can stress electrical components, potentially leading to short circuits or component failure. If you notice sparking, burning smells, or the breaker repeatedly tripping during the cycle, immediately discontinue use and consult a qualified technician.
Safety is paramount. Disconnect power at the breaker before any inspection or repair. Never bypass safety features like the door lock mechanism. Working with electrical appliances requires caution; if you’re uncomfortable, seek professional assistance. Ignoring electrical warnings can result in fire hazards or electrical shock; Remember, Viking ovens operate at high voltages, demanding respect and careful handling.
Professional Viking Oven Repair Services
When self-clean issues persist despite troubleshooting, or if you suspect complex electrical or mechanical problems, engaging professional Viking oven repair services is crucial. Attempting advanced repairs without specialized knowledge can exacerbate the issue and void warranties.
Certified technicians possess the expertise to diagnose and repair intricate Viking oven components, including control boards, door lock mechanisms, and heating elements. They utilize specialized tools and genuine Viking parts, ensuring lasting repairs.
Look for technicians specifically trained in Viking appliance repair, as their systems differ significantly from standard ovens. A reputable service will offer transparent pricing, clear explanations of the problem, and a guarantee on their work. Don’t hesitate to request references and check online reviews. Prioritize safety and quality; a skilled technician will restore your oven’s functionality and ensure safe operation, especially after a self-clean cycle malfunction. Ignoring complex issues can lead to further damage and costly replacements.
Preventative Maintenance for Self-Clean Functionality
Maintaining your Viking oven proactively extends the lifespan of its self-clean feature and prevents common issues. Regularly wiping up spills and food debris before they bake onto surfaces minimizes smoke and odor during the self-clean cycle. Avoid using harsh chemical cleaners inside the oven, as residue can interfere with the process.
Periodically inspect the door latch and seal for damage or wear, ensuring a tight closure during self-cleaning. A faulty seal compromises the cycle’s effectiveness and can pose a safety risk. Check the oven racks for stability and proper alignment; remove them before initiating the self-clean cycle as recommended.
Furthermore, avoid overloading the oven, as excessive food buildup can strain the self-clean system. Run the self-clean cycle periodically, even if the oven doesn’t appear heavily soiled, to prevent stubborn residue accumulation. Following these simple steps ensures optimal performance and minimizes the need for costly repairs, preserving the convenience of your Viking oven’s self-clean function.
Myths About Self-Cleaning Ovens
Numerous misconceptions surround self-cleaning ovens, including the belief that they eliminate the need for manual cleaning entirely. While effective, self-clean cycles don’t replace occasional wiping of spills. Another myth suggests the cycle is harmless to the oven’s components; high temperatures can, over time, affect sensors and the control board.
Many believe a lingering odor after self-cleaning indicates a problem, but this is often normal, stemming from burning food residue. However, a strong, acrid smell warrants investigation. Some assume the self-clean function is always safe, but it’s crucial to remove racks and avoid opening the door during operation.
Finally, the idea that all self-cleaning ovens operate identically is false. Viking ovens, with their specific design and features, require adherence to the manufacturer’s instructions. Disregarding these guidelines can lead to damage or reduced efficiency. Understanding these myths promotes responsible oven use and maintenance, maximizing its lifespan and performance.
No Responses